When your customers make their first purchases, your online store automatically creates customer accounts for their email address. Your customers can log into their accounts at any time through their personal Sign-In link sent to their inbox. Customers no longer have to remember yet another username and password.
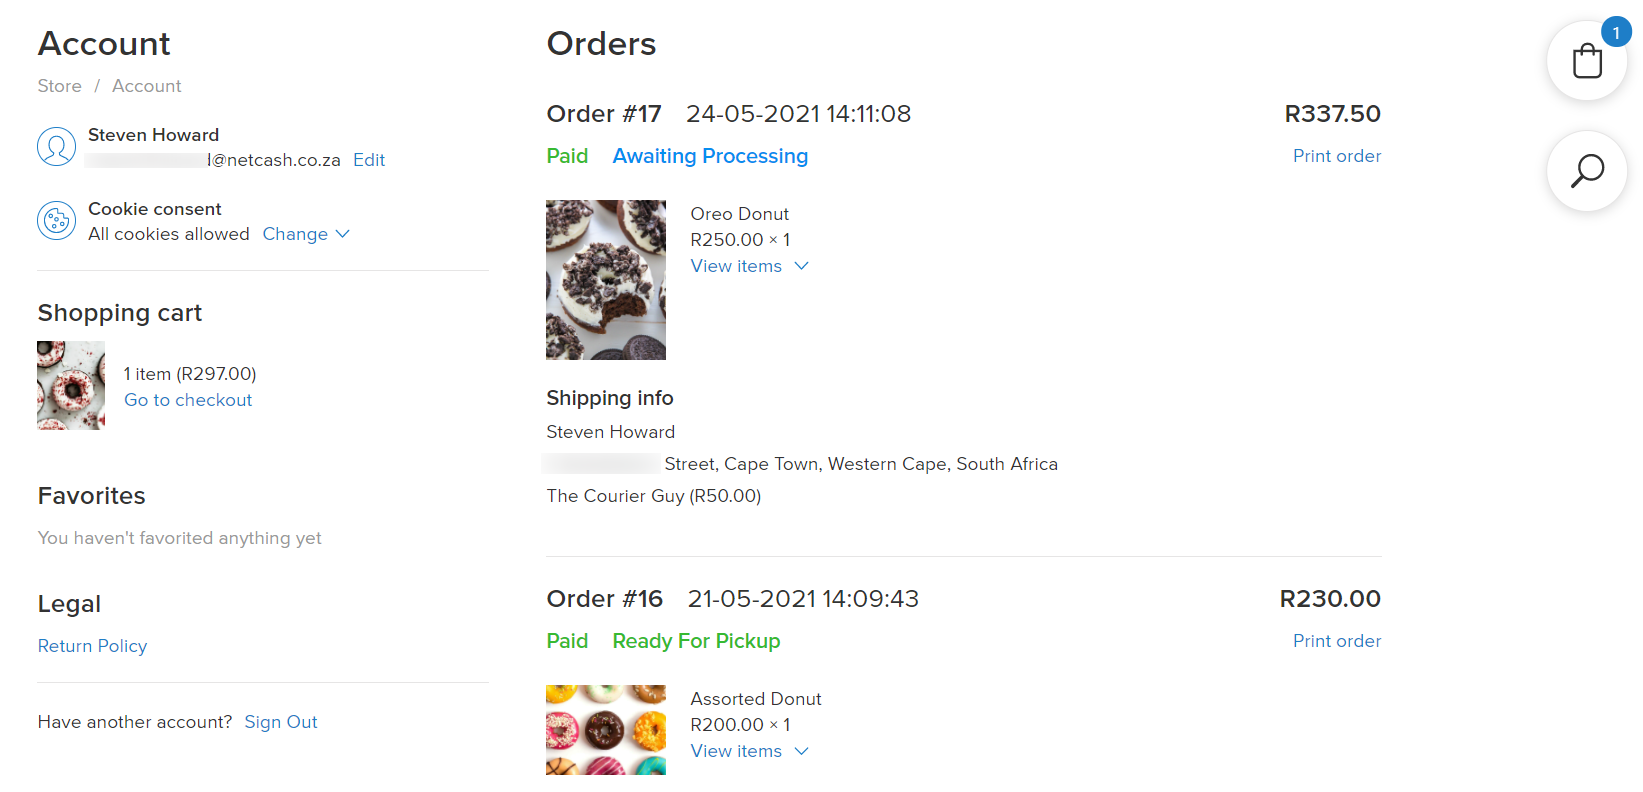
Customer accounts allow your customers to checkout faster, see order history with current payment and fulfillment statuses, see the list of their favorite products, specify the VAT ID, get access to their special member discounts, and view invoices.
Enabling/Disabling Sign-in option
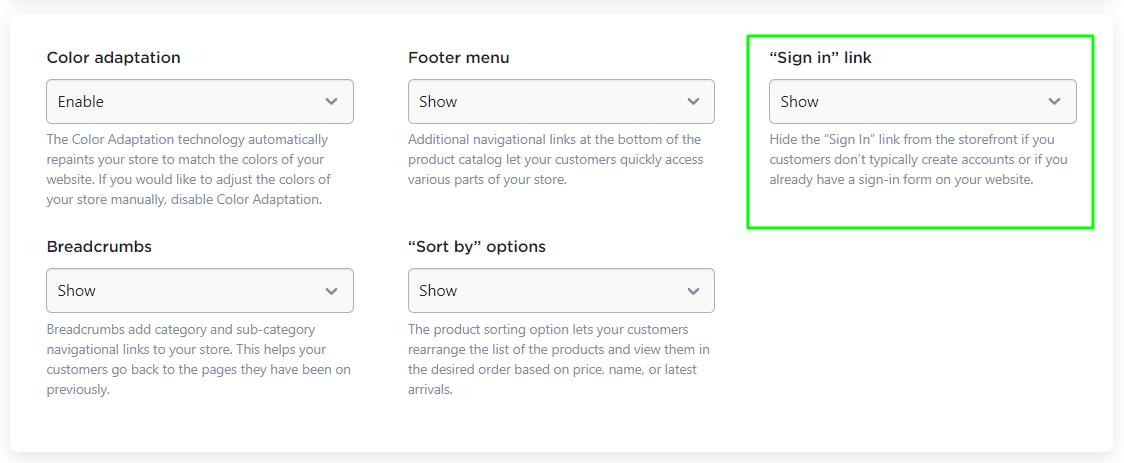
You can enable/disable the “Sign In” link from the storefront. If enabled, customers can find the Sign In option in the store footer under your catalog, so they can register or log in to their account:

To enable/disable the Sign In link in your storefront:
- From your store admin, go to Design.
- Scroll down to Storefront navigation & colors.
- Under the Sign In option select Show or Do not Show.
Signing in to Customer Accounts
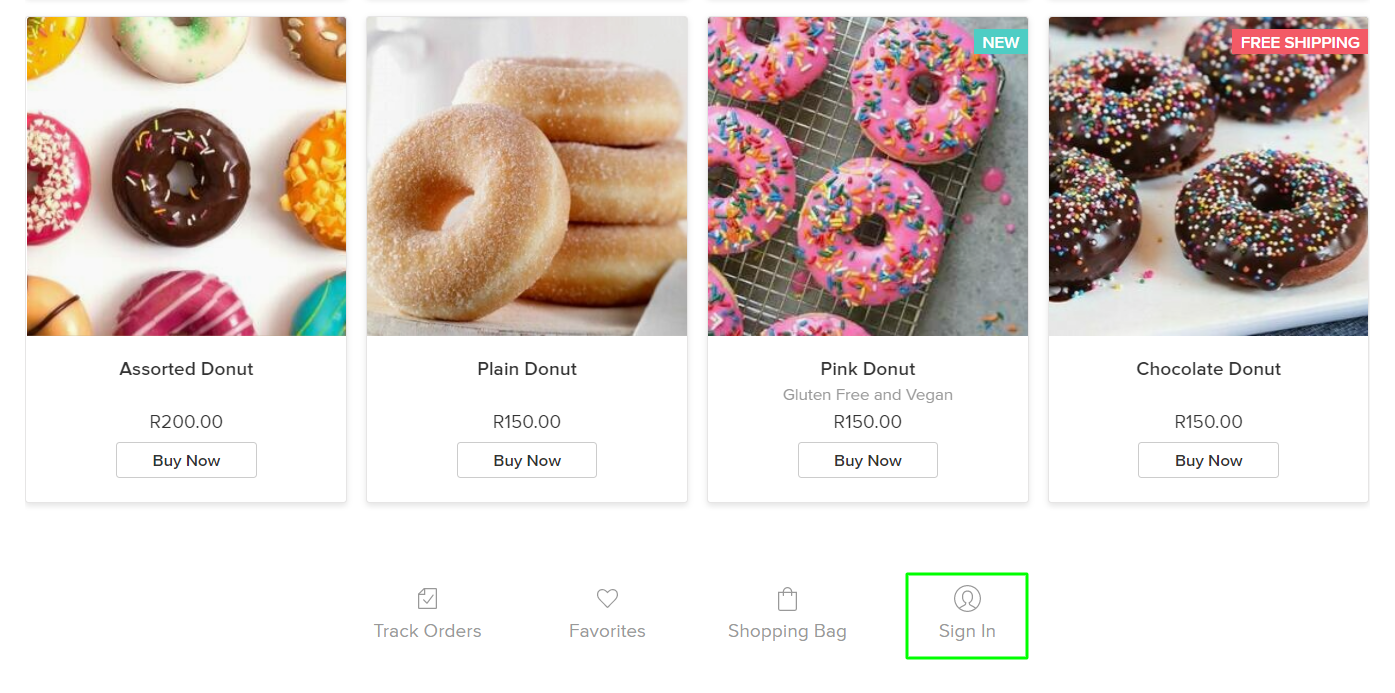
If your customer wants to create an account with your store, there is typically a list of links at the bottom of every page on your storefront, including a Sign In link where your customers can register or log in to their account.
To log into a Customer account (as a customer):
- On the storefront, click Sign In.
- Enter the email address for your account, then click Get Sign-In Link.
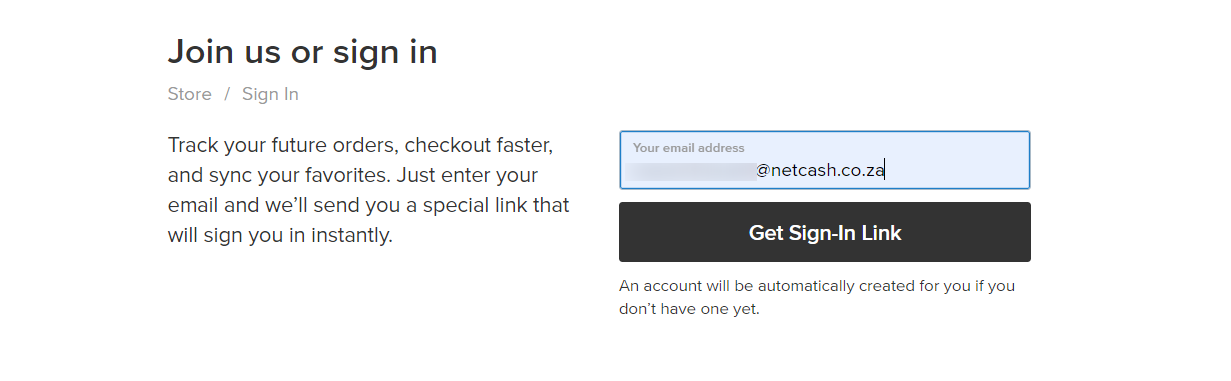
- Open your email inbox, then click a personal sign-in link in the email. This link can be used only once and is only valid for 14 days. Once clicked, you will be taken back to the store website.
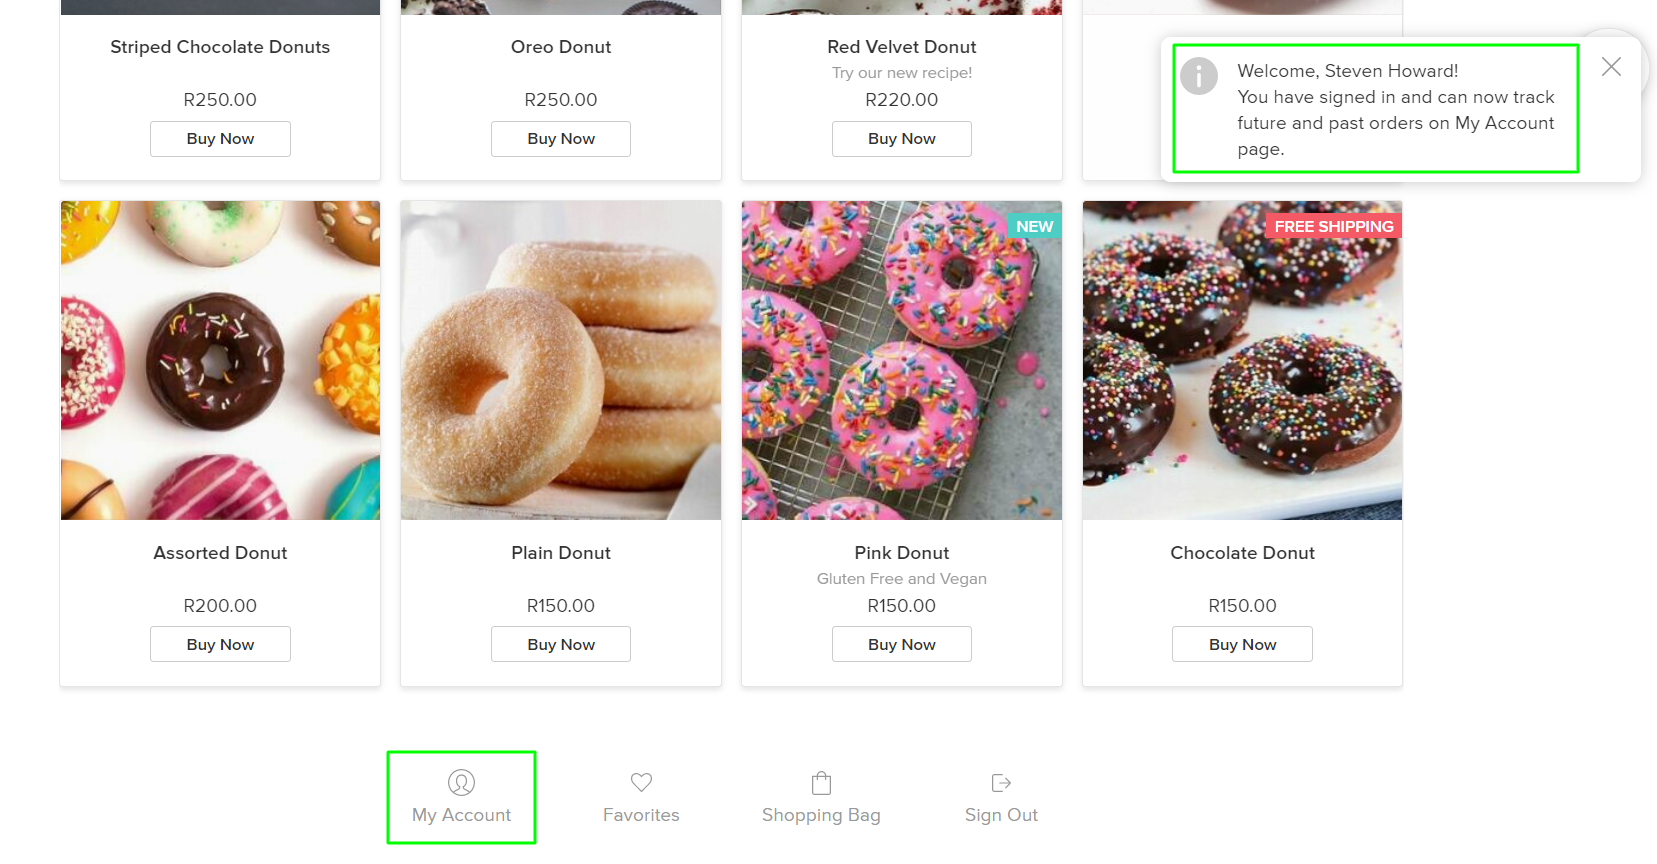
Now there is the My Account section along with the Sign Out option at the bottom of every page on the storefront:
When your customers access their My Account page, they see a dashboard of their account, with an overview of recently placed orders and their account data. From here your customers can view their shopping cart and wish list, specify the VAT ID, get access to their special member discounts, and view or download invoices.
Your customers stay signed into their accounts until they click the Sign Out link or start using another browser or device to shop in your store.