Email notifications are messages sent to store owners and customers. They inform users of various events that happen in the store: an order is placed, order status changes, a product’s stock is getting low, etc. Apart from admin notifications and transactional customer emails, your store can also send automated marketing emails that timely remind customers of your business and nudge them to purchase from you.
All the emails have universal ready-to-go texts, which can fit any business. You can use them straight away or customize the texts and appearance of your notifications. It is possible to brand the emails with your business-specific colors, rework their layouts, remove or add text blocks, etc.
Each email notification has its own template, which you can edit in your Netcash Shop admin, Settings > Mail.
Changing company info in emails
Company info includes store name and email, its physical address and phone number, a link to your store website, and links to your social media accounts. This information is taken from your store settings. It is displayed at the bottom of your email notifications:
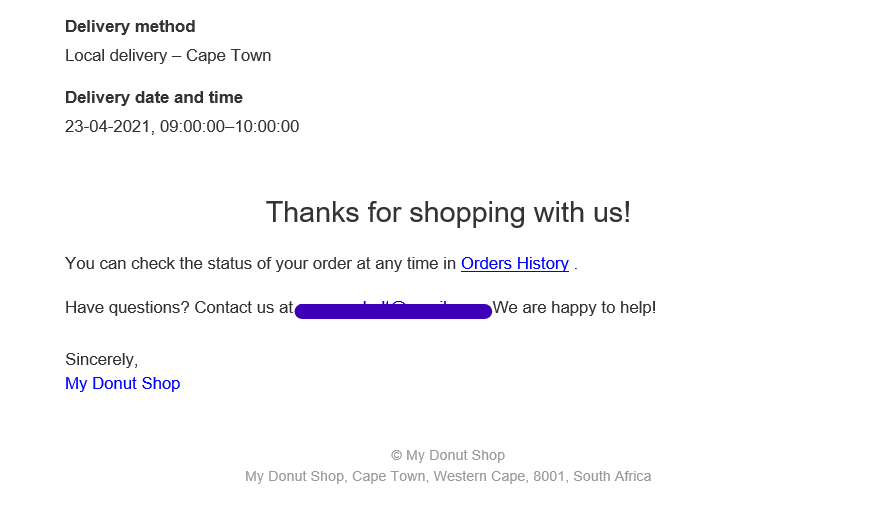
Company info in the order confirmation email.
To change or update the company info displayed in emails:
- From your Netcash Shop admin, go to Settings > General > Store Profile.
- Edit your company details.
- Save the changes.
After you save the changes, the updated info will display in the new email notifications.
Adding a logo to emails
You can add your company’s logo to the email notifications. A logo can help personalize your emails and build your own brand.
To upload or change a logo in your mail notifications:
- From your Netcash Shop admin, go to Settings > Mail.
- Scroll down to the bottom of the page to Your logo for mail notifications.
- Click Upload logo.
- Upload your store logo and save the changes.
This logo is set for all customer notifications. It will be displayed in the top right corner of the notification.
For Instant site users:
When you upload a logo to your Netcash Shop Instant site for the first time, it’s automatically added to your customer email notifications, invoices, and tax invoices. If you change the logo for the Instant site, you will need to manually update the logo used for your email notifications, invoices, and tax invoices in your Netcash Shop admin.
Understanding email templates
Any further edits in your email notifications will require editing the template of a particular notification. This way, you can add custom messages or customize notifications in any other way, e.g., remove or add blocks, change text formatting and color, etc.
Each admin or customer email notification has its own template. When an email is sent, the email template is filled in with the info from your store settings (store name, contact info, store link, etc.) and from the order details (customer’s name, shipping address, list of products bought, etc.) Thus, each email sent from your store is individual and contains information about a particular order and customer.
Email templates might look complicated at first, but in reality, their structure is quite plain.
If you go to Settings → Mail and click Order Confirmation (or any other notification), you will see a default order confirmation email template:

Message keys
If you open any email in Settings > Mail for editing, you will see that there are actually no texts in the template. Instead, you can see such text labels as <@rosetta.message key=”OrderConfirmation.title” />, <@rosetta.message key=”OrderConfirmation.payment_status” />, etc. When an actual email is sent, these rosetta message keys are replaced with texts. You can see an email with default texts if you click Preview template.
To add a custom text instead of the default one, you need to find the necessary rosetta label (its name is usually self-explanatory) and replace the whole rosetta label with your text, then preview the result and save the changes.
For example, to replace the default “Thanks for shopping with us!” text at the bottom of your order confirmation email, you need to find <@rosetta.message key=”OrderConfirmation.thanks” /> and replace it with your text (e.g., “Thank you for your purchase!”):

“Order Confirmation” email template
This is how the new signature might look:

Editing texts in the “Abandoned Cart Recovery” email template is even easier as it has plain text presented in a special area of the template. You can type your message in the “Default message for customers” area. For example, include a coupon code or a message about an upcoming sale in recovery emails to encourage customers to complete the purchase.
Here is a list of rosetta keys for the order confirmation emails (with corresponding texts):
| Rosetta key | Text in the notification |
| @rosetta.message key=”OrderConfirmation.title” | Order Confirmation |
| @rosetta.message key=”OrderConfirmation.customer_greeting” params={ “customerName”: customer.name } | Hello, customer name |
| @rosetta.message key=”OrderConfirmation.Confirmation.paid_order” params={ “storeName”: store.name, “dateCreated”: order.dateCreated } | We have received your order! Thank you for your purchase. (for paid orders) |
| @rosetta.message key=”OrderConfirmation.Confirmation.unpaid_order” params={ “storeName”: store.name, “dateCreated”: order.dateCreated} | We have received your order! Thank you for your purchase. (for unpaid orders) |
| @rosetta.message key=”OrderConfirmation.order_number” params={ “number”: order.number } | Order # |
| @rosetta.message key=”OrderConfirmation.payment_status” | Payment status |
| @rosetta.message key=”OrderConfirmation.fulfillment_status” | Fulfillment status |
| @rosetta.message key=”OrderConfirmation.Shipping.address_prefix” | We will deliver your order to |
| @rosetta.message key=”OrderConfirmation.Shipping.phone” params={ “phone”: order.shippingAddress.phone } | phone number |
| @rosetta.message key=”OrderConfirmation.Shipping.method” | Shipping method |
| @rosetta.message key=”OrderConfirmation.your_order” | Your order |
| @rosetta.message key=”OrderConfirmation.sku” params={ “sku”: orderItem.sku } | SKUs |
| @rosetta.message key=”OrderConfirmation.Summary.items” | Items |
| @rosetta.message key=”OrderConfirmation.Summary.shipping” | Shipping |
| @rosetta.message key=”OrderConfirmation.Summary.total” | Total |
| @rosetta.message key=”OrderConfirmation.order_comments” | Order Comments |
| @rosetta.message key=”OrderConfirmation.thanks” | Thanks for shopping with us! |
| @rosetta.message key=”OrderConfirmation.OrdersHistory.link_text” | Order History Page |
| @rosetta.message key=”OrderConfirmation.OrdersHistory.content” params={ “history_link”: historyLink } | You can check the status of your orders at any time on our Orders History Page |
| @rosetta.message key=”OrderConfirmation.Help.content” params={ “contact_info_text”: contactInfoText } | We welcome you to our store anytime. If you need assistance or have any questions, please email us at (email address). We are happy to help! |
| @rosetta.message key=”OrderConfirmation.signature” | Sincerely, |
If you don’t see the rosetta key you need for your notification in the table, try replacing this key with a test text, then click Preview template to see where the changes took place. This way, you will know what text the key is responsible for. The names of the keys also usually suggest it. You can always turn the template back to the default state afterward by clicking Revert to default.
You can delete some of the rosetta keys if you don’t want to display this information in the email notification.
Variables
Variables are placeholders that are replaced in the email with the actual information from either the order details (customer’s name, list of products, etc.) or from the store info (store name, contact info, etc.).
For example, you can see variables like ${store.name} or ${customer.name} in your email templates. As you can guess by their names, they will be replaced in the notifications with the store name taken from your store profile settings and with the customer’s name taken from the order details.

“Order Confirmation” email template
See the list of variables used in the email templates. You can delete some of the variables if you don’t want to display this information in the email notification or replace them with custom text. You can also edit or add variables that are supported in emails.
For example, if you want to show another company address in emails (not the one that you specified in your store profile), you can replace the ${store.officeAddress} variable with the address that you want to show in emails by adding the latter as plain text.
Markup
The text in blue, green, and red in your templates is called markup. These are rules that tell the email client how to display the text in the email: font color, size, padding, etc. You can change the markup rules if you want to change the layout and the design of your email.
Editing notification template
To edit a particular email notification, you need to make changes to the text of its template. Netcash Shop uses Freemarker in templates to replace variables with actual values and for their conditional rendering, while HTML tags define the structure of the email templates and how they look in the inboxes.
If you offer your store in multiple languages, please, note: After you edit the notification template, this particular notification can no longer be automatically translated. Your customers will receive it only in the default language of your store.
To edit an email template:
- From your Netcash Shop admin, go to Settings > Mail.
- Click Edit next to the template you want to change.
- In the HTML template, make the desired changes.
- Before saving any changes, click the Preview template link on top to see what the email will look like.If you see a blank page in a preview, it most likely means that the template code was broken (some tags were accidentally deleted). If you see this, you can simply click the Revert to default link to go back to the default template and try making your changes again.
- If you don’t like the result, click the Revert to default link at the bottom of the template to restore the default email template.
- Once you are satisfied with the result, click Save.
To check how email notifications will look with your changes, place a test order in your store. A test order is the best way to test email template changes as the preview shows demo products and data. Use your real email address at checkout, as this is where the email will be sent. You should also change the order payment and fulfilment status in the admin panel to receive a preview of different email notifications (order status changed, order shipped, etc.).
Translating email notifications into a new language
In Netcash Shop, you can send email notifications to customers in different languages. You can choose only one language for your storefront or offer your store – and notifications – in multiple languages. In the latter case, your notifications will be automatically translated, and customers will get email notifications in the same language in which they are viewing your storefront.
Customer email templates are available in more than 30 languages:
English, German, German (Switzerland), French, Italian, Spanish, Spanish (Latin America), Russian, Portuguese, Portuguese (Brazil), Dutch, Danish, Greek, Finnish, Norwegian, Swedish, Bulgarian, Hebrew, Czech, Catalan, Croatian, Polish, Estonian, Latvian, Lithuanian, Hungarian, Romanian, Slovenian, Turkish, Ukrainian, Indonesian, Macedonian.
Both customer and admin notifications are available in:
English, French, Spanish, Spanish (Latin America), German, Italian, Russian, Dutch, and Brazilian Portuguese.
If the language that you want to use for your email notifications is not yet available, you can add your own custom translation for them. In order to do that, manually replace the message keys in each of the templates with the corresponding translations. Message keys cover all the text in the notification, except for the values of payment and fulfillment statuses.
Please, pay attention to the fact that after you edit the notification template, this notification will only be available in the language that you manually translated it into. The autotranslation for multilingual stores will be no more available.
If you want to translate Netcash Shop into a new language or you find any mistakes in the translations, please feel free to use our Netcash Shop Translation Tool.