Creating product-specific shipping methods with a CSV file
Let’s say you created UPS, USPS, and self-pickup shipping methods. Most of your products you ship with USPS and use self-pickup. But for two of them, you want to use UPS postal service. In that case, you need to disable UPS shipping methods for all products in your store except two items and enable UPS for these two items.
To specify shipping methods for products in bulk, you should follow three steps:
- Export and edit a CSV file
- Import a CSV file
- Check the result
Step 1: Export and edit a CSV file
To edit shipping methods via CSV file (e.g., disable a shipping method for all products except two):
- From your Netcash Shop admin, go to Catalog > Products.
- Scroll down to Export products and click Export all.
- In the Export popup, Select SKU, Shipping rate type, Disabled shipping methods, Enabled shipping methods:
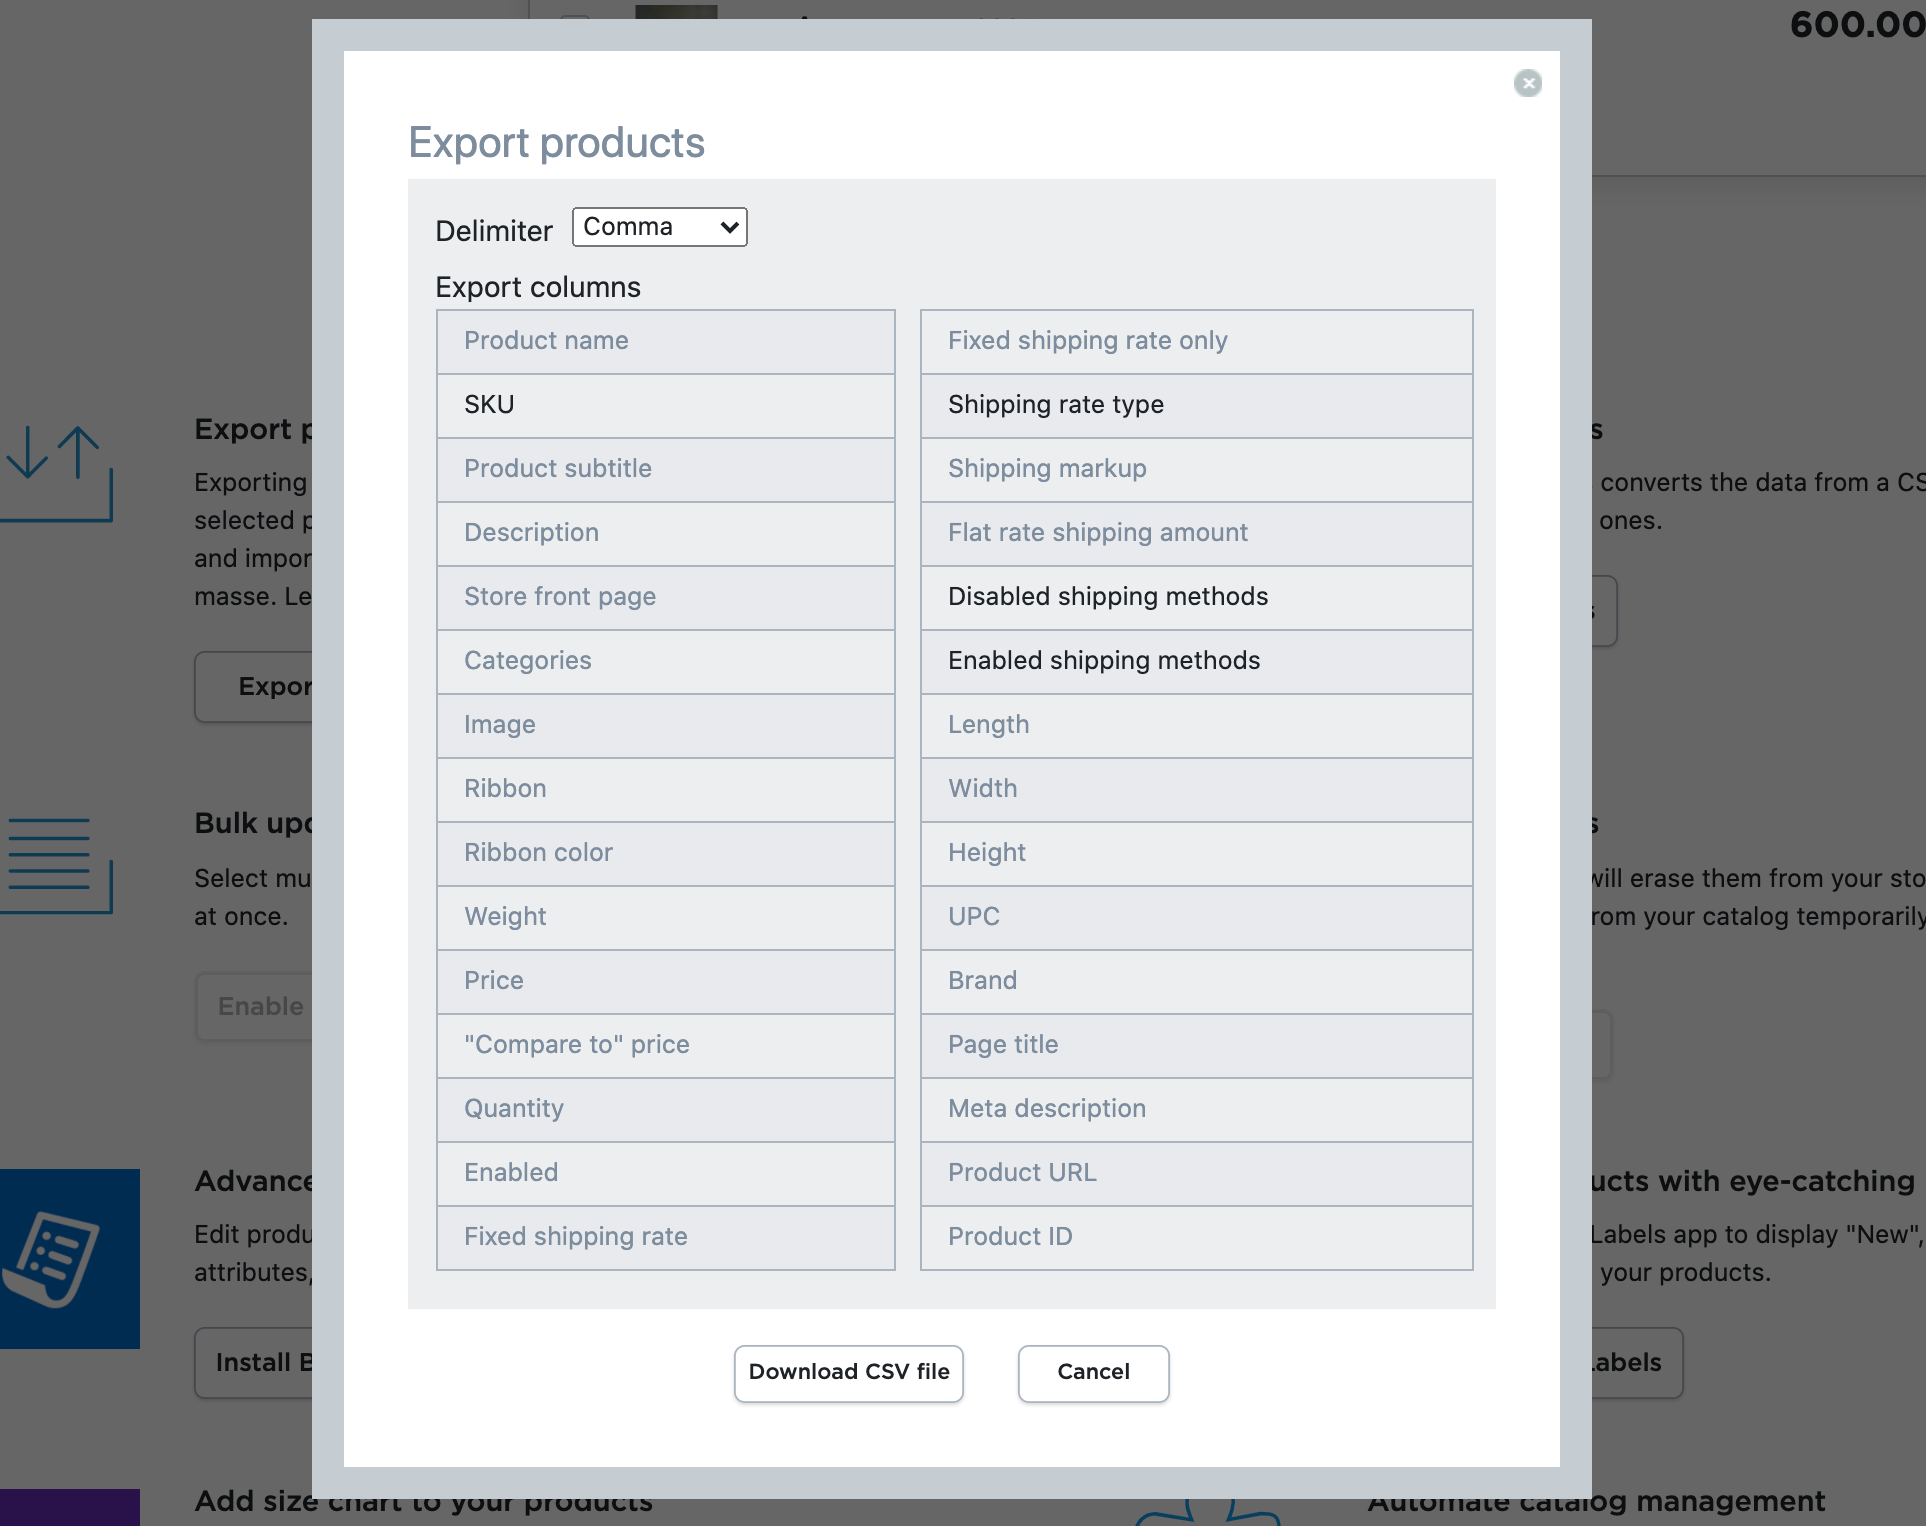
- Click Download CSV file.
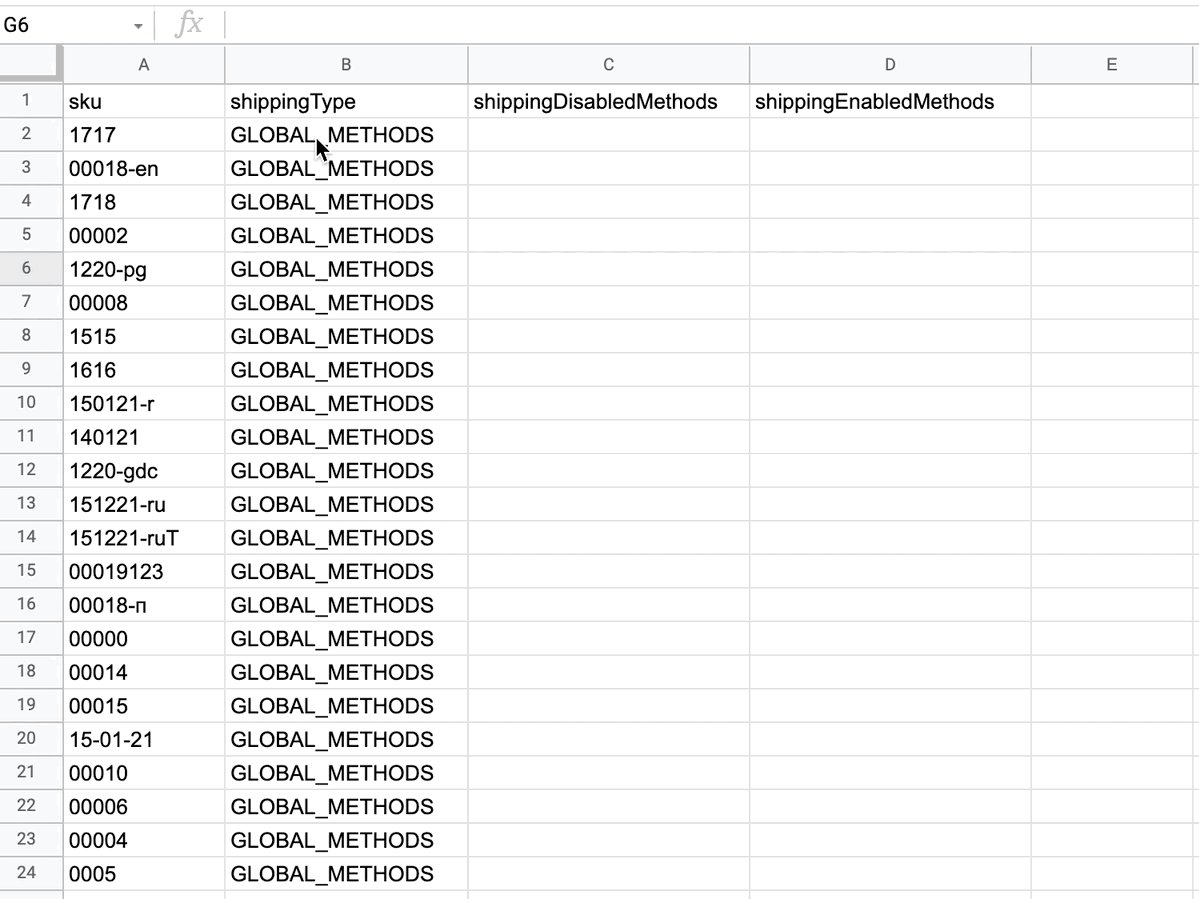
- Open your CSV file and start editing columns in the spreadsheet. In our example, we will edit the file in Google Sheets, but you can use any other software that works with spreadsheets. In the shippingType column, type SELECTED_METHODS for products you need to specify shipping methods to:
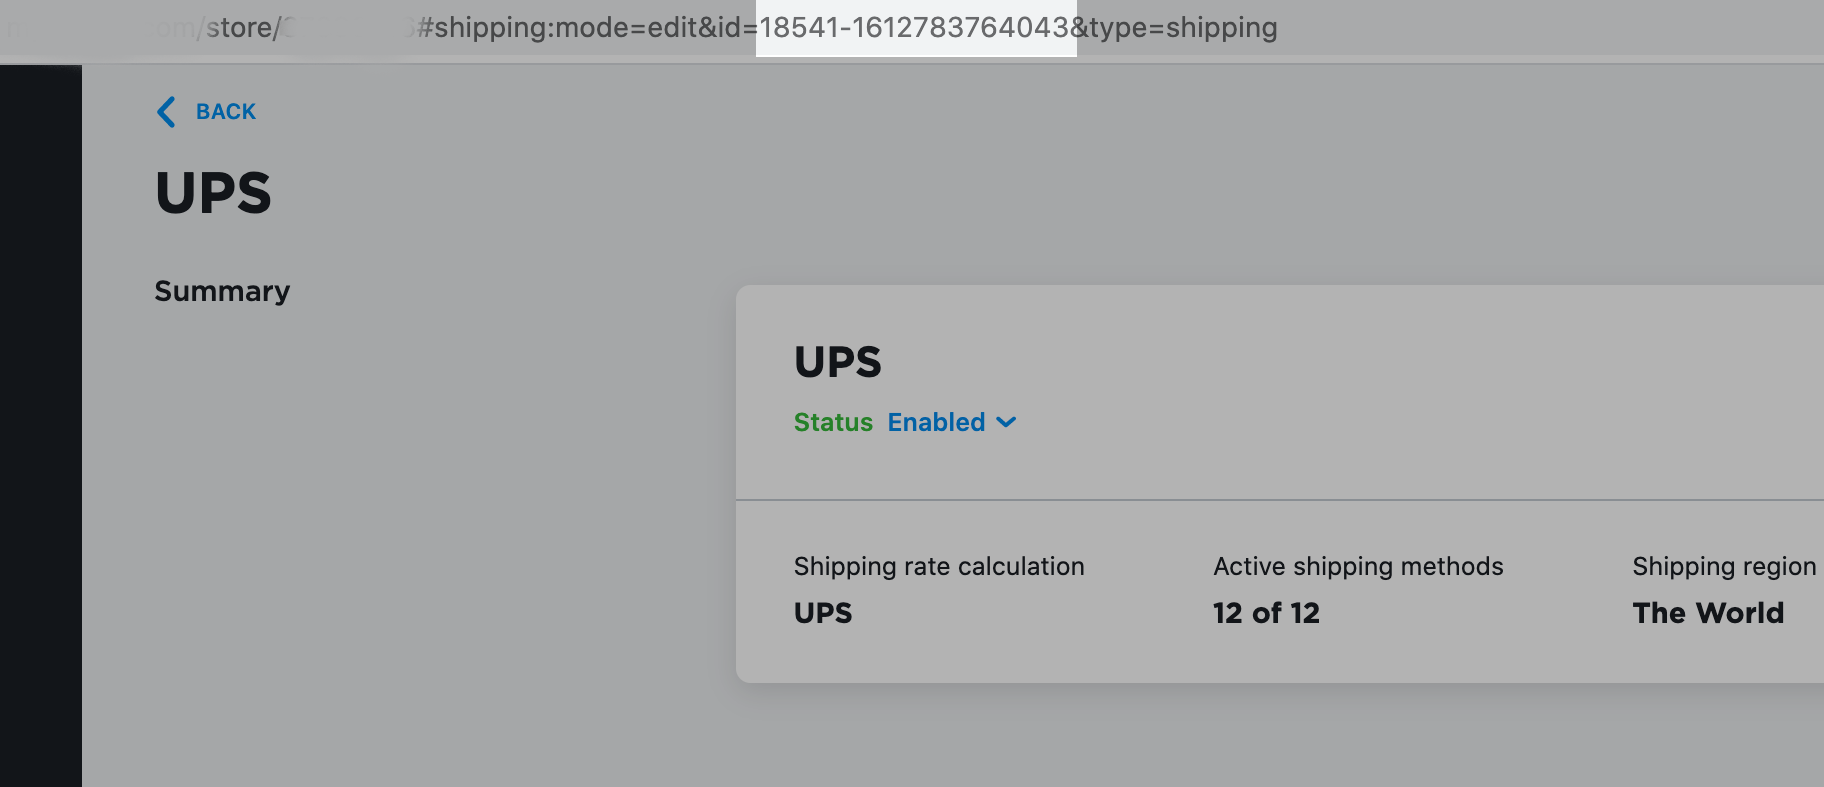
- In the shippingDisabledMethods column, specify the ID of the shipping method you want to disable. In our example, it’s the UPS. To find the ID of the UPS shipping method, simply open Shipping & Pickup page and select the UPS method. You’ll see the ID number in the browser address bar:
 Alternatively, you can set up one product manually in the required way. Then export it as a CSV file and find IDs of the shipping methods enabled/disabled. Use these IDs to manage a CSV file with all the products you need to specify shipping methods for.
Copy the ID numbers and paste them to the shippingDisabledMethods column. In our example, the ID should be in all the rows except two:
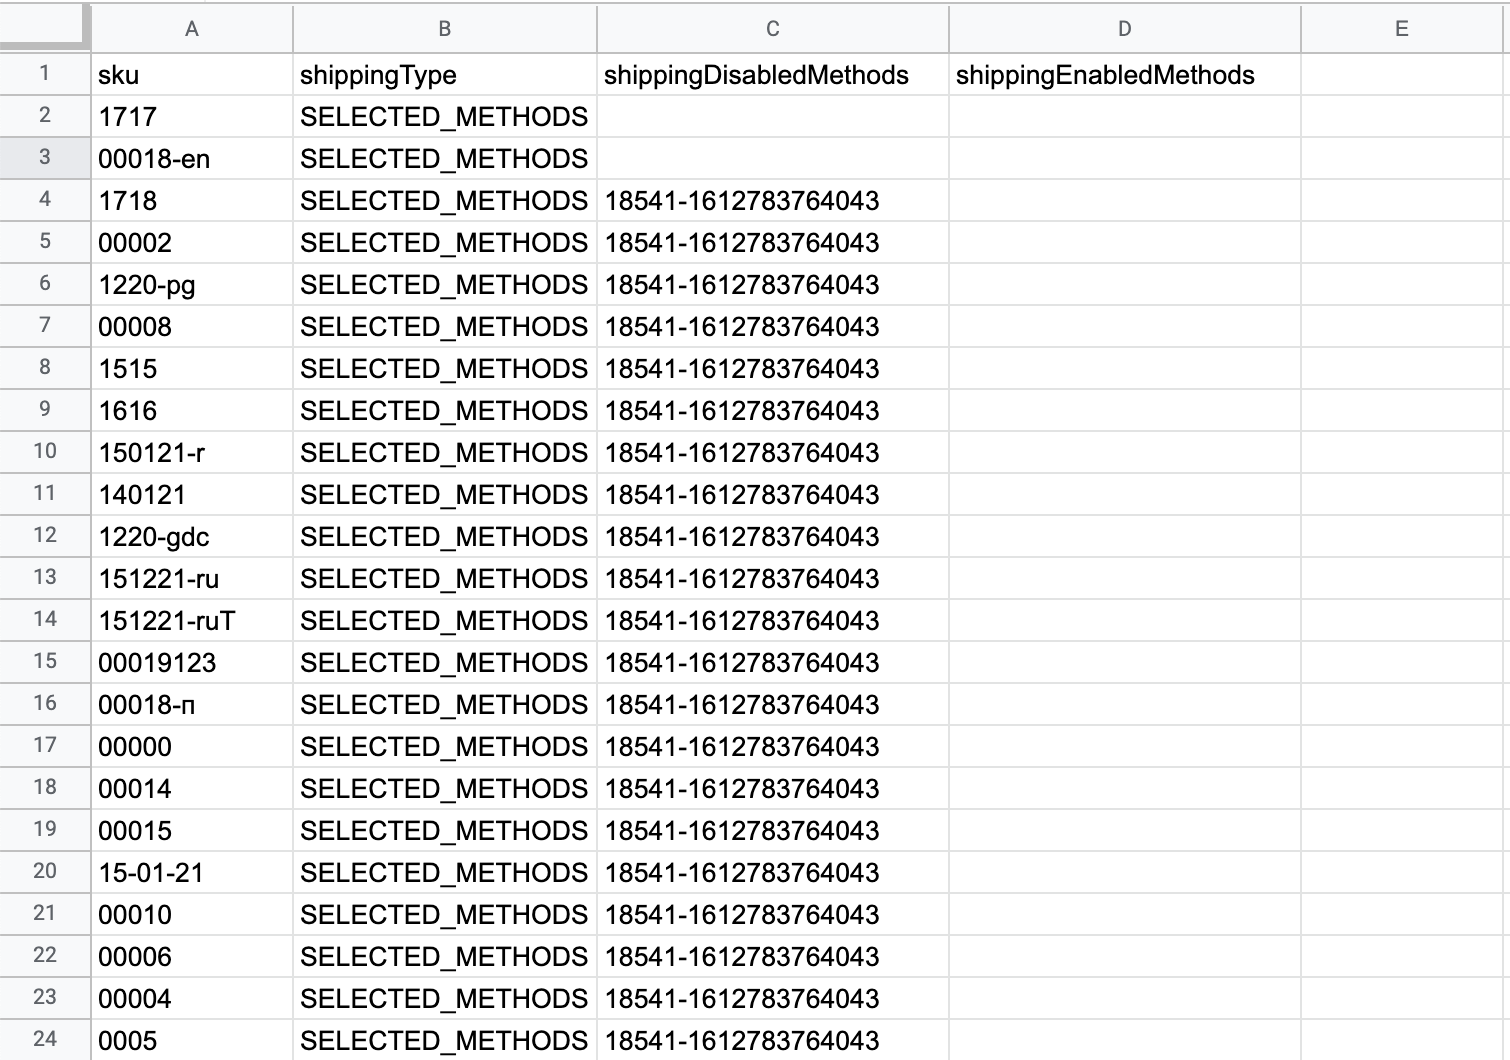 If you need to disable two or more methods, separate their ID numbers with the | sign. E.g., 9744-1544532932564|8580-1544118208690.
 - In the shippingEnabledMethods column, specify the shipping methods you want to enable. In our example, we want to enable only the UPS method for two items, so the ID for this method goes to this column:
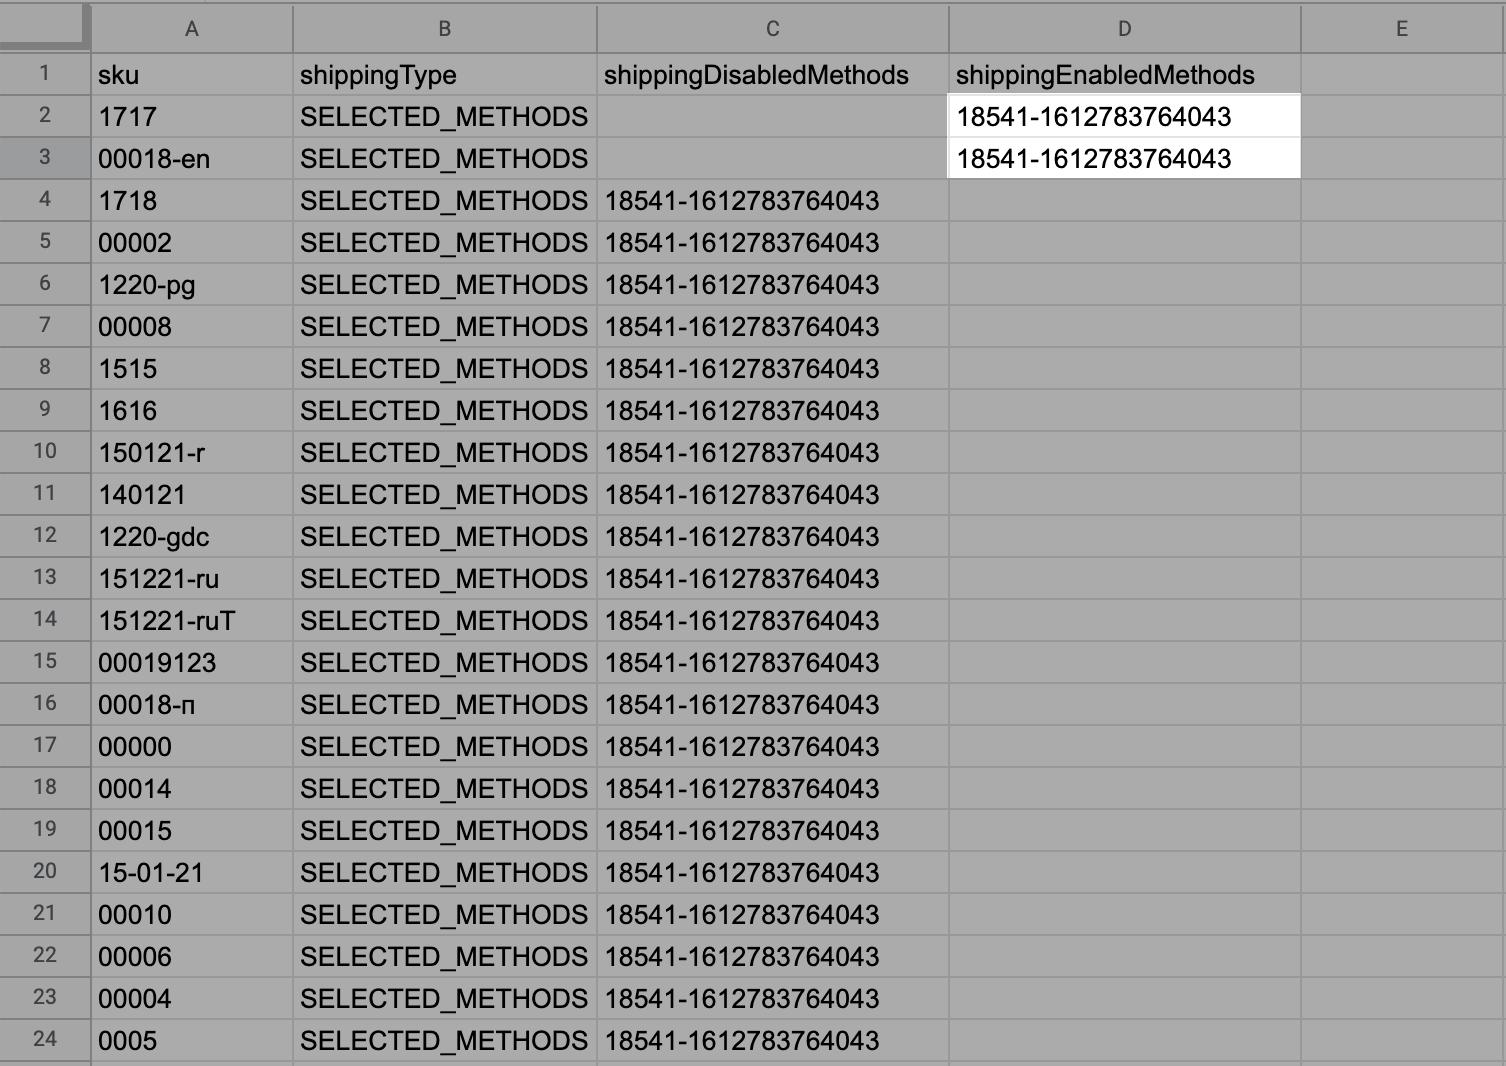 After you specified the method you want to enable, all other methods for these particular products are disabled automatically, so you don’t need to insert the IDs of methods you want to disable.
In case you want to use the UPS along with USPS and self-pickup for these two items, leave the shippingEnabledMethods column empty so that all other shipping methods from your store are available for the products. - Save the CSV file.
Step 2: Import updated CSV file to your Netcash Shop store
Now you have to import the CSV file to your store. Once you import the file, your products shipping methods will be updated.
To import the CSV file to your Netcash Shop store:
- From your Netcash Shop admin, go to Catalog > Products.
- Scroll down to the Import products section and click Import Products.
- Select the delimiter used in your file (in our example, it is a comma), the character encoding (it’s UTF-8 in most cases), and choose the import columns in the same order you have them in your CSV file.
- Click Import.
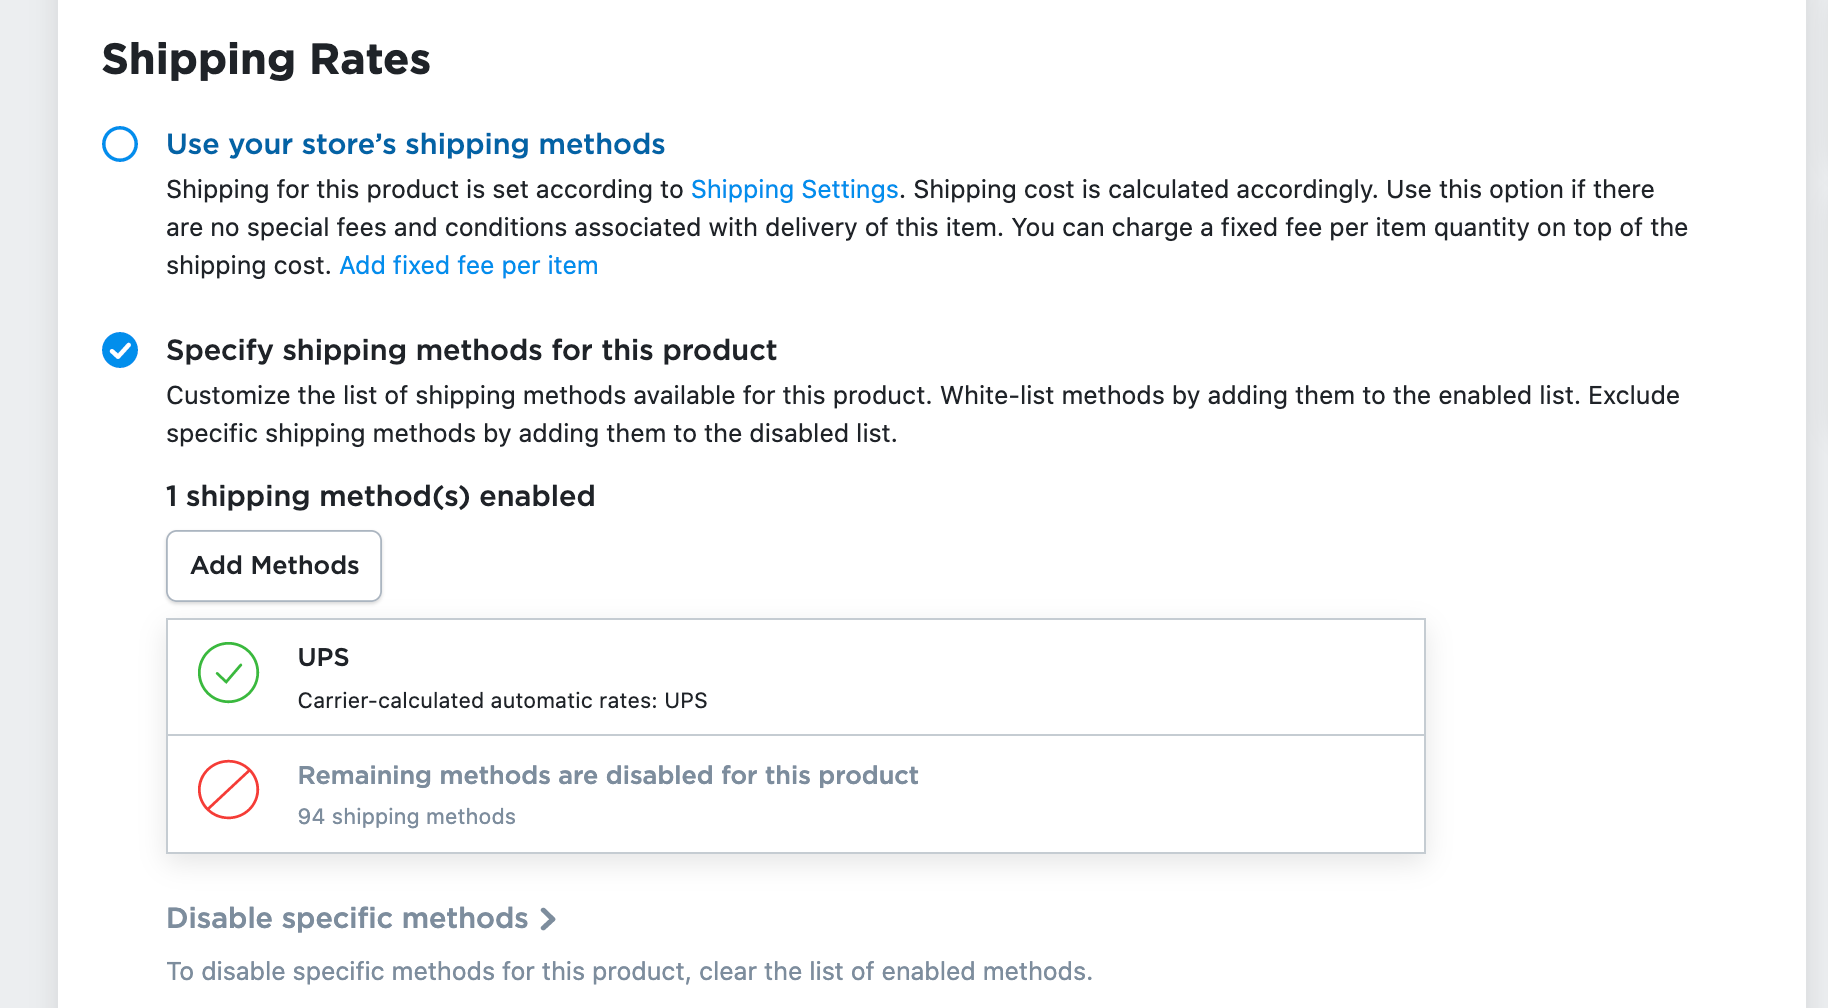
Done! Now your product’s shipping methods are updated. To make sure you did everything right, check out the shipping methods for specific products.
Step 3: Check the result
To make sure that you imported the correct data:
- Go to Catalog > Products and choose a product you specified the shipping methods to. In our case, it’s two products that should have only the UPS shipping method enabled.
- Open the Tax and Shipping tab and check if the product has the shipping method you need: